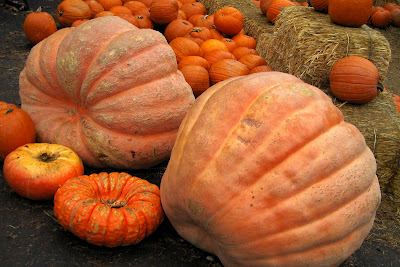
I found this little guy at the store the other day...it's it a cutie?! Only $2.99!
I just love cooking up fresh pumpkin, but it's come to my attention that most people only buy pumpkins for carving. The reason - they don't know how to cook a pumpkin.
I admit, pumpkins (and squash in general) can be a bit intimidating. But let me tell you...a pumpkin pie made with fresh pumpkin is absolutely amazing. So is pumpkin cake, pumpkin soup, pumpkin risotto, pumpkin ice cream, and the list goes on and on. And the value is amazing! You can get so much more for your money when you bake your own pumpkin. From my little pumpkin, I got over 30 ounces of baby food and enough additional pumpkin to bake a pie!
I wanted to share with you something that I found in my mother's cookbook. It was entitled "Preparation of a Pumpkin (Circleville Pumpkin Show, 1982)". These are the most thorough instructions I have ever seen on cooking fresh pumpkins, and they've been my guide for years.
Selecting a Pumpkin
In selecting pumpkin for cooking or storing, be sure they are bright colored, firm, unblemished, and of maximum maturity, indicated by good color and a stem that breaks easily from the vine. Pumpkins should be stored in a cool, dry place away from the danger of frost. Do not let them freeze; it injures their keeping qualities.
Cooking a Pumpkin
To Boil: Cut in half and remove seeds and stringy portion. Peel and cut in small pieces. Cook covered, in one inch of boiling salted water 25 to 35 minutes or until tender. Drain and mash.
To Microwave: Place pumpkin pieces cut-side down on a microwave safe plate or tray. Microwave on high for 15 minutes and then check for doneness. Continue cooking at 1-2 minute intervals if necessary.
And my preferred method...
To Bake: Halve pumpkin, remove seeds and strings, arrange pieces cut-side down on baking sheet or in a shallow pan. Bake at 400 degrees until tender, about one hour. Scoop out pulp and put through sieve or food mill.
Pictures and Tips - To Bake a Pumpkin
Cutting a pumpkin in half is scary! I used to use all of my big fancy kitchen knives, and I usually ended up cutting myself more than the pumpkin. Things finally got easier when I discovered pumpkin carving tools (the kind you can buy for just a few dollars at Wal-Mart or Target). Amazing! Those little knives are made to cut right through the peel and flesh, and they make cutting the pumpkin a breeze. Don't be fooled by how cheap they are...get some today!
When it comes to scooping out the seeds and strings, the pumpkin carving set once again came to the rescue. That little plastic spoon doesn't look like much, but it gets the job done well (and saves my nice metal spoons from being bent in the process).
I highly recommend lining your baking pan with foil before placing your halved pumpkins on them. Saves a ton of clean-up time when all is said and done!
Baked pumpkin smells soooooo good! When it's perfectly done, the flesh should easily separate from the peel. Be careful...it's hot!
Preparing Cooked Pumpkin
Blender: If you really want a smooth puree (especially for baby food or ultra-impressive pies), consider using a blender. Pour 1/3 cup water into the blender for every 2 cups of cut-up pumpkin. Blend until smooth. Then - very important if you are using the pumpkin in place of canned pumpkin - cook the puree over medium heat in a shallow pan, stirring constantly, until it is very thick. Boiling it evaporates all of the water that you added while blending. Use the puree as you would canned pumpkin.
For an even more smooth puree, pass your blended pumpkin through a sieve. I personally don't do this unless I'm making baby food.
Canning Your Pumpkin
Cut the pumpkin into medium pieces, remove peel, and steam or boil until tender. If steaming, add little or no water; if boiling, add only enough water to cover. Put pumpkin and any remaining liquid through food mill or strainer. Spices may be added. Simmer until heated through, stirring often. While hot, pack loosely into clean jars, filling to within 1/2 inch of top. Put on cap, screwing band firmly tight. If canning with a pressure cooker, use 10 pounds pressure, 60 minutes for pints and 80 minutes for quarts. If using a boiling water bath, process for 180 minutes for pints and quarts. If freeze canning, packed cooked and cooled pumpkin puree in airtight containers, allowing 1" head space.


No comments:
Post a Comment